
Create and Configure a User in MSSQL

This article will show you how to create and configure a user in MSSQL.
  1. Open SQL Server Management Studio (SSMS).
  2. Connect to SQL Server using your log in information.
  3. In the left-hand panel, expand Security > Logins.
  4. Right click Logins and select New Login from the drop-down menu.
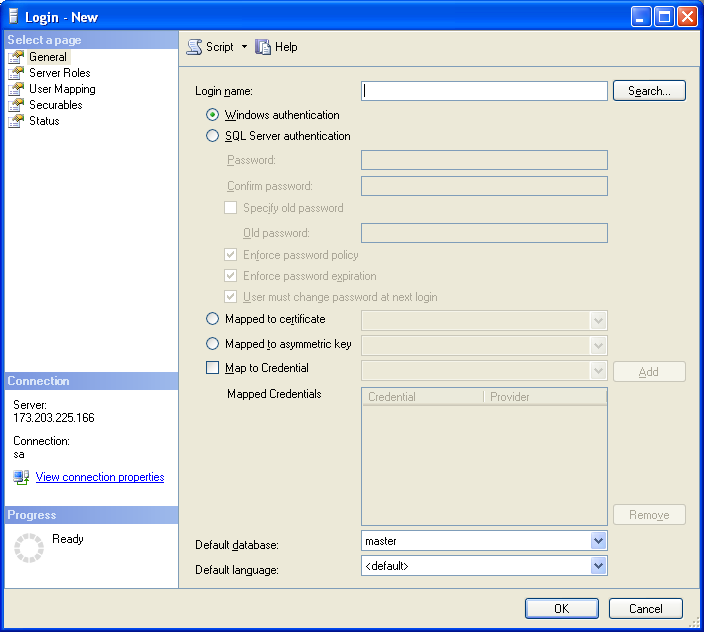
  5. Assign a Login name and select the authentication method and default database/language.
  6. Note: Only Domains can use Windows Authentication.
    If you are using SQL authentication you will need to enter an initial password and choose the enforcement options for password policy and expiration as well as whether or not the user will need to change their password when they log in.
    ssmsnewlogin1.PNG
  7. In the left-hand panel, click Server Roles to assign any server roles you want this user to have, including bulkadmindbcreatorpublic, and so on.
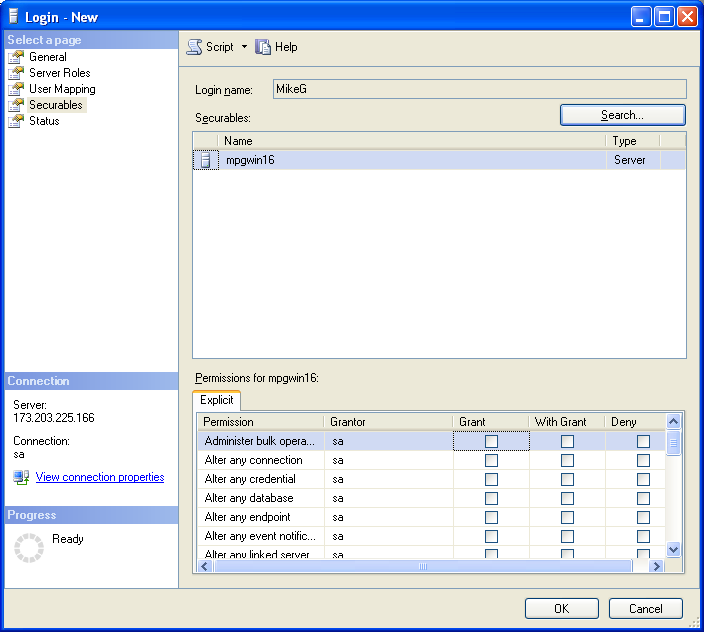
  8. In the left-hand panel, click Securables and then click Search.
    The Add Objects dialog box displays, where you can choose specific objects, objects of a certain type or the server itself. Select one and click OK.
  9. On the Securables page, select GrantWith Grant or Deny as necessary for any/all of the objects in the explicit box.
    Grant will grant access to the securable, with grant will allow the user to grant access to the securable and deny will expressly deny permission to the securable no matter what roles or permissions the user may have.
    ssmsnewlogin3.PNG
  10. In the left-hand panel, click Status to grant or deny permission to the Database Engine, enable or disable the login and to unlock the account should it get locked out.
When you have finished modifying the settings, click OK to create the user and exit the new login creation window.
Ref: https://support.rackspace.com/how-to/creating-and-configuring-a-user-in-mssql/


Comments

Popular posts from this blog

ASP.NET MVC - Set custom IIdentity or IPrincipal

Here's how I do it. I decided to use IPrincipal instead of IIdentity because it means I don't have to implement both IIdentity and IPrincipal. Create the interface interface ICustomPrincipal : IPrincipal { int UserId { get ; set ; } string FirstName { get ; set ; } string LastName { get ; set ; } } CustomPrincipal public class CustomPrincipal : ICustomPrincipal { public IIdentity Identity { get ; private set ; } public bool IsInRole ( string role ) { return false ; } public CustomPrincipal ( string email ) { this . Identity = new GenericIdentity ( email ); } public int UserId { get ; set ; } public string FirstName { get ; set ; } public string LastName { get ; set ; } } CustomPrincipalSerializeModel - for serializing custom information into userdata field in FormsAuthenticationTicket object. public class CustomPrincipalSerializeMode...

Validate credit card number with Mod 10 algorithm in C#

Introduction All you know what information contains in your NIC number. But do you know what information contains in the Credit Card Number? Following article provides brief details about what information contain in your credit card and demonstrates to how to validate credit card number using mod 10 (Luhn) algorithms with C#. Background  Card Length   Typically, credit card numbers are all numeric and the length of the credit card number is between 12 digits to 19 digits.  14, 15, 16 digits – Diners Club 15 digits – American Express 13, 16 digits – Visa 16 digits - MasterCard   For more information please refer  http://en.wikipedia.org/wiki/Bank_card_number . Hidden information  Major Industry Identifier (MII)   The first digit of the credit card number is the Major Industry Identifier (MII). It designates the category of the entry which issued the card.     1 and 2 – Airlin...

kendo ui menu dynamic - ASP.NET MVC

Model Class public class DynamicMenu {     public int MenuID { get; set; }     public string MenuName { get; set; }     public int ParentMenuID { get; set; } } Controller Code public ActionResult Menu() {      ViewData["DynamicMenu"] = new List<DynamicMenu> {             new DynamicMenu{ MenuID = 1, MenuName = "Self", ParentMenuID = 0 },             new DynamicMenu{ MenuID = 2, MenuName = "Functional", ParentMenuID = 0  },             new DynamicMenu{ MenuID = 3, MenuName = "Leave", ParentMenuID = 1 },             new DynamicMenu{ MenuID = 4, MenuName = "Leave Application", ParentMenuID = 3 },             new Dynamic...